
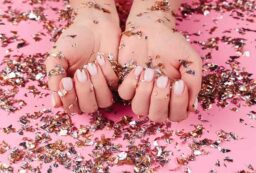
Russian manicure is an advanced technique that delivers elegant and long-lasting results. This manicure method has gained popularity in recent years due to its precision and sophisticated appearance. In this article, the wholesale nail supply distributor will explore the key steps to achieving a perfect Russian manicure. Whether you are a professional nail technician or simply a nail beauty enthusiast, these steps will help you achieve salon-quality results.
1. Nail Prep
Before starting any manicure, it is essential to prep your nails. First, you must remove any remaining nail polish. Next, soak your hands in warm, soapy water to soften the cuticles. Then, use a cuticle stick to gently push the cuticles back towards the base of the nails. Finally, file your nails to give them the desired shape.
2. Choosing Tools and Products
To achieve a Russian manicure, you will need specific manicure kits such as nail file, nail buffer, and wooden stick. Make sure to use high-quality products such as protective base coats, nail polishes in various colors, and top coats to protect and seal the manicure.
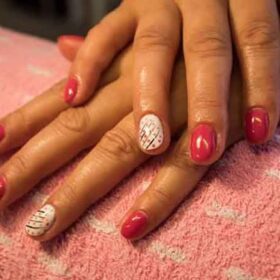
3. Russian Manicure Technique
The Russian manicure technique differs from traditional methods. It involves using a special gel to create a transparent border near the cuticle, giving the illusion of longer nails. This technique requires great precision and a steady hand. Don’t hesitate to practice on fake nails to improve your technique before moving on to real nails.
4. Gel Application
Carefully apply a thin layer of gel to the nail, making sure to leave a space near the cuticle for the transparent border. Use a UV lamp to catalyze the gel and harden it. Repeat this step for each nail.
5. Creating the Clear Border
This is the crucial step of the Russian manicure. Using precision tweezers, gently place a thin strip of clear gel near the cuticle. Make sure the line is straight and even on each nail.
6. Choosing the Colors
After creating the clear border, it’s time to choose the nail polish colors you want to apply to your nails. You can opt for bright and bold colors or softer and more muted tones depending on your preference.
7. Applying the Nail Polish
Carefully apply the nail polish to each nail. Start from the center of the nail and then stretch the polish out to the sides. Make sure to leave a small margin around the clear border so that it remains visible.
8. Drying
Wait until the nail polish is completely dry before moving on to the next step. You can use a nail dryer to speed up the process.
9. Finishing
Once the nail polish is dry, apply a top coat to seal the manicure and give it a glossy finish. Make sure to cover the entire nail surface.
10. Cleaning
Gently clean any excess nail polish or gel around the nails using a thin brush dipped in nail polish remover.
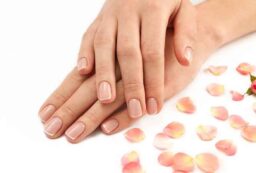
11. Moisturizing the cuticles
After completing the Russian manicure, be sure to moisturize your cuticles with an oil or cream specially designed for this purpose. This will help keep your nails and cuticles healthy.
12. Maintenance
To extend the life of your Russian manicure, avoid doing household chores without wearing protective gloves. Do not use your nails as a tool to open objects and avoid biting them.
Conclusion
The Russian manicure is a refined and elegant technique that requires practice and patience. By following these key steps, you will be able to achieve a perfect Russian manicure yourself. Feel free to experiment with different colors and patterns to create unique and personalized looks.
Read also: The right steps to take care of your feet


Leave a Reply